Favors are something I have been struggling with since we got engaged. We're on a super tight budget because we have other financial priorities besides getting married (gasp!) and I wanted to budget about a dollar a person. Originally we were planning on inviting 100+ people so I knew whatever it was I purchased would have to be something really cool. I thought back to previous weddings I had been to (which are not too many, actually) and the one favor that really stood out, which wasn't even a favor, was a polaroid picture of myself and Mr. K for a polaroid guestbook the couple had. Our picture had some random friends being crazy in the background so we were allowed to take a second photo for the guestbook and keep the first one. Immediately I went to Amazon and purchased a polaroid camera and 200 pieces of film.
Then our plans changed. Feeding 100+ people happens to be really expensive. We chopped our wedding down to 40 people, including us, and moved it to another island so we would have an excuse to keep it intimate. Now I had a little extra leeway in terms of providing an actual favor.
At this point I am going to let you know that I have an unhealthy obsession with trees. Seriously--I'm obsessed. I try my hand at artwork here and there and it seems every thing I create is tree related. See below:
Anyways, you get the picture. Needless to say I wanted something eco- and budget-friendly to be our favors. I hate hate hate hate hate favors that are completely useless. After some time googling and looking through various wedding blogs, I found THIS at favorscreative.com. If you're too lazy to click, it is basically a little grow your own herb kit. It includes a little biodegradable pot, soil pellet, herb seeds, and instructions--all inside a little box wrapped with ribbon. This company is charging $3.50 per favor. $3.50 was still $2.50 over my budget so I did a little shopping around and created something very similar myself.
1) I purchased two packages of peat pots, 23 pots per package, which were 2 and a quarter inches tall from Amazon for about $2 per package.
2) At Home Depot I purchased about 50 peat pellets for $4. I also purchased herb seeds for about $1.50 per seed packet.
3) The favorscreative boxes are made out of recycled cardboard, which I didn't have. However, I did have a whole lot of cardstock I had picked up at Walmart in the reams of paper aisle. It looks just like a ream of paper, except with cardstock inside. Using my Martha Stewart Scoring Board and Fiskars Paper Trimmer, I made 3x3x2 little boxes. I was really careful with the way I cut the paper, however.
4) I tried to utilize each sheet of cardstock as much as possible. To make a 3x3x2 box, you need pieces of cardstock that are 7"x7" for both the lid and the box. When using 8.5x11 cardstock, this meant I would need to use 80 pieces of cardstock in order to make 40 boxes. I made sure for each of those 80 pieces of paper, I cut it in a particular way in order to make the most of the paper:
THEN I still had to cut 7x7 pieces for the bottoms which was actually more simple:
5) After cutting everything out, I scored the tops and bottoms using the scoring board and went ahead and assembled the bottoms of the boxes. I highly recommend the Martha Stewart Scoring Board for this. I am not artsy by ANY MEANS. I just pretend. I had no idea all of the things you can make with paper, but the scoring board is cool if you want to make cards, envelopes, or boxes yourself.
6) I separated out my seeds into 10-15 seeds per packet and made little origami packets out of the 4x4 piece of cardstock. Instructions can be seen here. Actually, that packet at the link is cuter than mine because it is a trapezoid and mine is just a square. I then stamped the name of the herb seeds on the packet with letter stamps.
7) I stamped a tree on all of the lids and then assembled the lids.
8) I put everything in the boxes, including the instructions, pot, pellet, and seeds, then put the lids on. Note: I did have to cut the little pots down a bit because they were 2 and 1/4 inch when I only could fit 2" pots inside.
9) Using yarn I made a bow using this tutorial from youtube.
In the bottom right corner of the box, I'll be stamping our last name in kanji (Mr. K is a 4th generation plantation Japanese); unfortunately, my FFIL has misplaced the stamp.
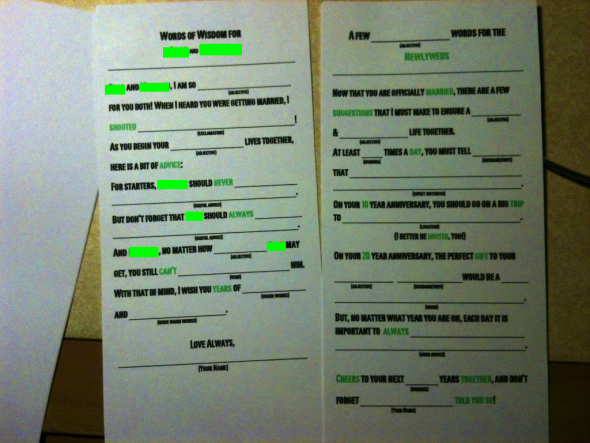
Also, you may have noticed that on the bottom template it says I was using a piece for guestbook mad libs. I saw some really cute madlibs on Etsy and shamelessly plagarized them and printed them out myself (**don't tell!**)
Sincerely,
Ms. Koloa


No comments:
Post a Comment